
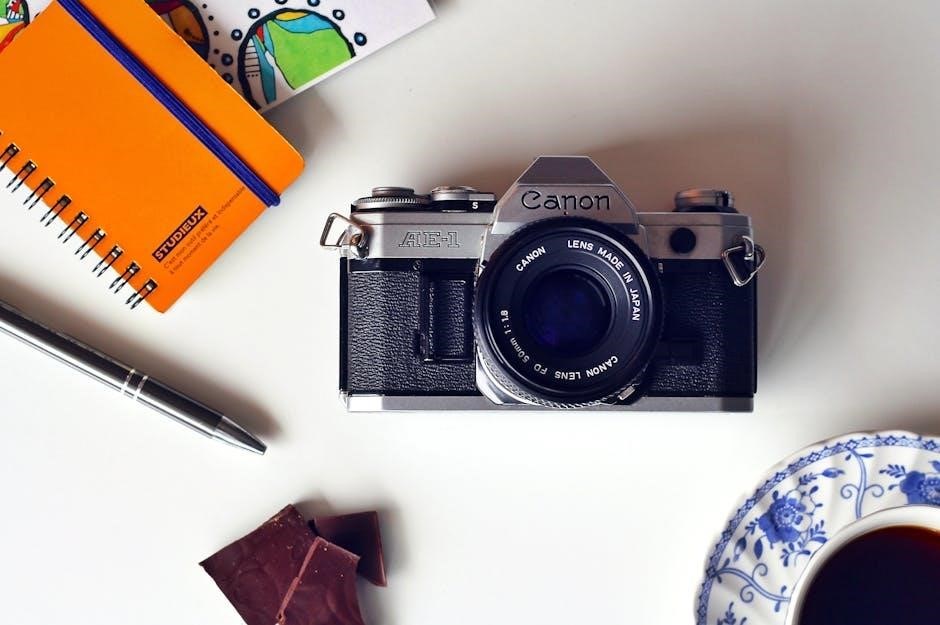
The Canon AE-1 is a 35mm SLR film camera released in 1981‚ designed for amateur photographers. Known for its durability and ease of use‚ it remains a favorite among photography enthusiasts and students. Its intuitive controls and compatibility with Canon FD lenses make it a versatile tool for learning and creative photography.
1.1 Overview of the Canon AE-1 Camera
The Canon AE-1 is a 35mm single-lens reflex (SLR) film camera introduced in 1981. It is part of the AE series‚ which debuted in 1976 and gained immense popularity for its user-friendly design. The camera features aperture-priority and manual shooting modes‚ a built-in light meter‚ and compatibility with Canon FD lenses. Its robust construction and intuitive controls make it an excellent choice for both beginners and experienced photographers seeking a reliable analog photography tool.

1.2 Historical Significance and Popularity
The Canon AE-1‚ introduced in 1976‚ revolutionized photography by offering advanced features at an affordable price. It became a cornerstone for amateur photographers and professionals alike‚ selling over 5 million units. Its popularity stemmed from its durability‚ intuitive design‚ and compatibility with Canon FD lenses. The camera’s success laid the foundation for future SLR models and remains a cherished tool in film photography‚ symbolizing the golden era of analog cameras. Its enduring appeal continues to inspire photographers today.
1.3 Key Features and Capabilities
The Canon AE-1 features a 35mm film format‚ manual controls‚ and compatibility with Canon FD lenses. It offers shutter-speed priority mode‚ manual focusing‚ and a built-in light meter for precise exposures. The camera supports film speeds from ISO 12 to 3200 and includes a battery check feature. Its durable construction and intuitive design make it ideal for both enthusiasts and professionals. The AE-1 also supports flash photography and accessories like motor drives‚ enhancing its versatility for various shooting scenarios.

Camera Components and Controls
The Canon AE-1 features a mode dial‚ film advance lever‚ and rewind knob on the top. These components provide easy access to essential camera functions.
2.1 Naming the Parts – Top View
The top view of the Canon AE-1 reveals key components: the mode dial‚ film advance lever‚ rewind knob‚ shutter speed dial‚ and aperture ring. The mode dial allows selection of shooting modes‚ while the film advance lever is used to advance the film. The rewind knob enables film rewinding‚ and the shutter speed dial adjusts exposure time. The aperture ring‚ located on the lens‚ controls the aperture setting. These components provide intuitive control over camera settings‚ ensuring precise operation.
2.2 Understanding the Mode Dial and Shooting Modes
The Canon AE-1 features a mode dial on the top‚ allowing photographers to select from multiple shooting modes. These include Programmed AE (Auto Exposure)‚ Shutter-Speed Priority‚ and Manual Override. Programmed AE offers automatic exposure settings‚ ideal for beginners. Shutter-Speed Priority enables manual control over shutter speed‚ with aperture adjusted automatically. Manual Override provides full control for experienced users. The mode dial is intuitive‚ ensuring easy transitions between settings to suit various photographic needs and preferences. Each mode offers flexibility‚ catering to both novice and advanced photographers.
2.3 The Film Advance Lever and Rewind Knob
The film advance lever on the Canon AE-1 is used to manually advance the film to the next frame after each exposure; Located on the top right‚ it must be pulled outward and turned clockwise to advance the film. The rewind knob‚ positioned on the top left‚ allows photographers to rewind the film back into its cassette once the roll is complete. Proper use of these components ensures smooth film handling and prevents damage to the camera or film. Regular maintenance of these parts is essential for optimal performance.

Setting Up and Configuring the Camera
Begin by setting the film speed (ISO) and ensuring the battery is installed. Load the film‚ then advance it using the lever until it stops. This ensures proper setup for shooting.
3.1 Loading Film into the Camera
Load film into the Canon AE-1 by opening the camera back. Insert the film cassette into the take-up spool‚ ensuring the film leader aligns correctly. Gently close the back‚ making sure it clicks securely. Advance the film by turning the film advance lever until it stops‚ which sets the first frame. Check the frame counter to confirm it reads “1.” This process ensures the film is properly loaded and ready for shooting. Always handle the film in low-light conditions to prevent exposure.
3.2 Setting the Film Speed (ISO)
To set the film speed on the Canon AE-1‚ locate the film speed ring on the lens. Rotate it to match the ISO of your film‚ ensuring it is set before loading the film. This calibration ensures proper exposure settings; Some films may have recommended ISO settings printed on the packaging. Once set‚ the camera will automatically adjust its exposure calculations based on the selected ISO. Note that the AE-1 reads the film speed through the lens only in specific modes‚ so refer to the manual for mode-specific details.
3.3 Battery Installation and Battery Check
Install the PX-28L or 4SR44 battery by opening the battery compartment on the bottom. Ensure correct polarity to avoid damage. Press the battery check button to verify power. If the LED blinks‚ the battery is low. Replace it promptly to maintain camera functions. Always use fresh batteries for reliable performance. Store spares separately to prevent leakage. The camera will alert you with a blinking light when the battery is weak‚ ensuring you never miss a shot due to power issues.

Shooting Modes and Techniques

The Canon AE-1 offers Programmed AE‚ Shutter-Speed Priority‚ and Manual Override modes. It balances automation with manual control‚ catering to both beginners and experienced photographers effectively.
4.1 Programmed AE (Auto Exposure) Mode
The Programmed AE mode on the Canon AE-1 automatically sets both aperture and shutter speed for optimal exposure. This mode is ideal for beginners‚ as it simplifies the photography process by ensuring well-balanced exposures in most lighting conditions. It also allows for manual override‚ giving users flexibility when needed. Perfect for candid shots and fast-paced situations‚ this mode ensures quick adjustments. The combination of automation and manual control makes it versatile for various photography scenarios‚ catering to both ease of use and creative control.
4.2 Shutter-Speed Priority Mode
The Shutter-Speed Priority mode allows users to manually set the shutter speed‚ with the camera automatically adjusting the aperture for proper exposure. This mode is ideal for controlling motion effects‚ such as freezing fast-moving subjects or creating blur. Users can select shutter speeds from 2 seconds to 1/1000th of a second. The battery check button also serves as a shutter speed indicator in this mode. Perfect for sports‚ action‚ or low-light photography‚ it offers creative control while maintaining automatic aperture adjustment for optimal results.
4.3 Manual Override and Flash Usage
The Manual Override mode grants full control over both aperture and shutter speed‚ allowing photographers to bypass automatic settings. This mode is ideal for precise creative control‚ especially in challenging lighting conditions. Additionally‚ the Canon AE-1 supports flash photography‚ with a standard X-sync speed of 1/60th of a second. Flash units can be mounted on the hot shoe or connected via a sync cord. The camera’s manual mode is distinct from the Program mode‚ offering greater flexibility for advanced shooters and flash photography enthusiasts alike.

Focusing and Metering
The Canon AE-1 features manual focusing and a built-in light meter for precise exposure control. Its metering system provides accurate readings‚ ensuring well-balanced photos in various lighting conditions.
5.1 Manual Focusing Techniques
Manual focusing on the Canon AE-1 is achieved by rotating the lens focusing ring. Use the viewfinder’s split-image microprism and microprism ring for precise focus. Align the split image or use the central focusing spot for sharp results. Ensure the subject is centered for accurate focusing. Gently turn the lens ring until the image sharpens. For low-light conditions‚ use a tripod or steady hand to avoid camera shake. Manual focus allows full control‚ enabling photographers to achieve exact focus for creative or technical needs.
5.2 Built-In Light Meter and Metering Modes
The Canon AE-1 features a built-in through-the-lens (TTL) light meter‚ providing accurate exposure readings. It offers center-weighted average and partial metering modes. To use the meter‚ ensure the battery is installed and functioning. Look through the viewfinder; the meter needle will indicate the optimal exposure. Align the needle with the center mark by adjusting aperture or shutter speed. This system ensures precise control over lighting conditions‚ allowing for well-balanced exposures in various shooting scenarios‚ making it a reliable tool for photographers of all skill levels.
Maintenance and Care
Regularly clean the camera and lens with soft materials. Store in a cool‚ dry place‚ avoiding direct sunlight and high temperatures to maintain functionality.
6.1 Cleaning the Camera and Lens
Regular cleaning is essential to maintain the Canon AE-1’s performance. Use a soft‚ dry cloth to wipe the camera body and external components. For the lens‚ apply a lens cleaning solution with a microfiber cloth‚ avoiding harsh chemicals. Never touch the lens element‚ as oils from skin can damage it. Use compressed air to gently remove dust from visible areas. Avoid using tissues or paper products‚ as they may scratch surfaces. Proper cleaning ensures optimal image quality and prolongs the camera’s lifespan.
6.2 Proper Storage and Handling
Store the Canon AE-1 in a cool‚ dry place‚ away from direct sunlight and high temperatures. Use silica gel packets to absorb moisture and prevent fogging. Handle the camera with care to avoid mechanical stress. Always replace lens caps when not in use to protect against dust and scratches. Avoid leaving the camera in extreme environments‚ such as a car trunk in direct sunlight. Proper storage ensures longevity and maintains the camera’s functionality for years of reliable use.

Troubleshooting Common Issues
Common issues include shutter lock due to low battery‚ film loading errors‚ or improper lens attachment. Check battery levels‚ ensure film is loaded correctly‚ and clean lenses regularly. Always refer to the manual for specific solutions or consult a professional for complex repairs to maintain optimal camera performance and longevity.
7.1 Shutter Release Lock and Battery Problems
The shutter release lock engages when the battery is insufficient‚ preventing accidental exposures. Check the battery level using the battery check button. If the batteries are weak or improperly installed‚ replace them with fresh ones. Ensure the battery compartment is clean and free of corrosion. If issues persist‚ consult the manual or contact a professional. Proper battery maintenance ensures reliable camera operation and prevents potential damage to internal components. Always use recommended battery types for optimal performance and longevity of your Canon AE-1.
7.2 Film Loading and Advancement Issues

If the film fails to load or advance properly‚ ensure the film leader is correctly aligned with the red mark on the take-up spool. Gently advance the film lever until it stops to secure the film. If the lever doesn’t move smoothly‚ check for obstructions or improper loading. Avoid forcing the lever‚ as this may damage the mechanism. If issues persist‚ rewind the film and reload it‚ ensuring the film is seated correctly. Proper loading and advancement are crucial for smooth operation and preventing film waste.
The Canon AE-1 is a timeless camera that combines simplicity with advanced features‚ making it ideal for both beginners and experienced photographers. To get the most out of your AE-1‚ always handle the camera and lens with care‚ store it properly‚ and maintain it regularly. Experiment with different film stocks and shooting techniques to expand your creative possibilities. Remember to use the built-in light meter and shooting modes effectively for optimal results. Happy shooting‚ and enjoy the journey of capturing moments with this iconic camera!