The Amana Smart Thermostat offers a sleek‚ modern interface for controlling your HVAC system. With Wi-Fi connectivity‚ it enables remote management through the Amana Home app. Features include voice control via Amazon Alexa‚ advanced scheduling‚ and energy usage tracking. Designed for ease of use‚ it integrates seamlessly with smart home systems‚ optimizing energy efficiency and comfort.
1.1 Overview of Amana Smart Thermostat Features
The Amana Smart Thermostat features Wi-Fi connectivity‚ enabling remote control via the Amana Home app. It supports voice commands through Amazon Alexa‚ allowing seamless temperature adjustments. The thermostat includes a user-friendly touchscreen interface‚ advanced scheduling options‚ and energy usage tracking. It also offers geofencing capabilities and smart recovery modes to optimize energy efficiency. Compatibility with various HVAC systems ensures versatile installation options for different home configurations.
1.2 Benefits of Using a Smart Thermostat
Using a smart thermostat like the Amana model offers enhanced energy efficiency‚ remote temperature control‚ and cost savings. It allows users to adjust settings from anywhere via the Amana Home app‚ optimizing comfort and energy use. Features like geofencing and smart recovery ensure efficient operation‚ while integration with smart home systems provides seamless control‚ making it a convenient and modern solution for managing your home’s climate effectively.
Pre-Installation Requirements
Ensure system compatibility by verifying wiring and HVAC setup. Gather required tools and materials‚ and confirm a stable power supply. A USB-C cable is needed for provisioning.
2.1 System Compatibility Check
Verify that your HVAC system is compatible with the Amana Smart Thermostat. Ensure the system supports the required wiring configuration‚ including connections for R‚ C‚ 1‚ and 2 wires. Check if your system is a conventional PTAC or a heat pump‚ as separate profiles are needed for proper functionality. Refer to the Amana Smart Thermostat manual or manufacturer’s guidelines for specific compatibility details.

2.2 Tools and Materials Needed
Gather the necessary tools and materials before starting the installation. You will need a screwdriver‚ wire strippers‚ and a voltage tester to ensure safe handling of electrical components. Additionally‚ have wire nuts or connectors‚ mounting screws‚ and the provided mounting hardware. A USB-C to USB-C cable is required for provisioning the thermostat. Ensure all materials are compatible with your specific Amana Smart Thermostat model for a smooth installation process.
Installation Steps
Prepare the site‚ remove the old thermostat‚ and mount the new Amana Smart Thermostat. Connect the wires carefully‚ following the wiring diagram. Perform final checks to ensure proper installation and functionality before powering on the system. Refer to specific sections for detailed step-by-step instructions.
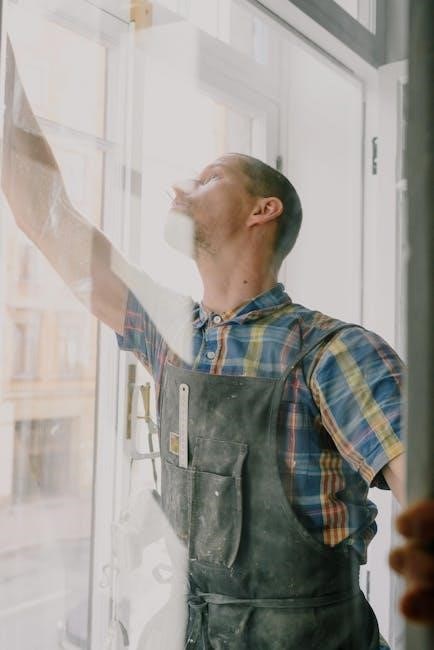
3.1 Preparing the Installation Site
Ensure the area is clear and accessible. Switch off the HVAC system at the circuit breaker. Remove the old thermostat and inspect the wiring for damage. Clean the wall surface and ensure it is dry and free from debris. Verify the mounting plate is level and secure. Handle electrical components safely to avoid damage or risk of shock. This preparation ensures a smooth and safe installation process.
3.2 Removing the Old Thermostat
Switch off the HVAC system at the circuit breaker. Gently pull the old thermostat away from the wall to disconnect it from the mounting base. Carefully remove any screws securing it. Slide the thermostat upward to release it from the base plate. Label the wires for identification. Handle the device with care to avoid damage or electrical risk. Set the old thermostat aside safely for disposal.
3.3 Mounting the New Thermostat
Begin by ensuring the flush-mount base is level and securely fastened to the wall using the provided screws. Align the new thermostat with the mounting base‚ ensuring proper fitment. Gently push the device onto the base until it clicks into place. If using a USB-C cable‚ connect it to the thermostat’s USB-C terminal for provisioning. Avoid forcing the device to prevent damage. Ensure the thermostat is firmly seated and evenly aligned for proper functionality.
3.4 Connecting the Wires
Connect the wires from the indoor unit to the corresponding terminals on the Amana Smart Thermostat. Match the wires (R‚ C‚ 1‚ 2) to their respective terminals. Ensure all connections are secure to avoid communication errors. If wired incorrectly‚ the system may not function properly. Carefully handle the wires to prevent damage. Connect wires 1 and 2 from the indoor unit to the outdoor unit as specified in the wiring diagram.
3.5 Final Installation Checks
After completing the installation‚ verify all wire connections are secure and correct. Power on the system and check for any error messages on the thermostat display. Test basic functions like temperature adjustment and mode switching to ensure proper operation. Confirm the display is clear and responsive. If issues arise‚ consult the troubleshooting section or manual for guidance. Ensure the thermostat is properly paired with the HVAC system for optimal performance.
Wiring and Electrical Connections
Ensure correct wire connections (1‚ 2‚ C‚ R) to avoid communication errors. Verify proper grounding and power supply for safe and efficient thermostat operation.
4.1 Understanding the Wiring Diagram
The wiring diagram outlines connections for the Amana Smart Thermostat‚ ensuring proper setup. It specifies terminals for power (R‚ C)‚ heating (W)‚ cooling (Y)‚ and fan (G). Correctly matching these wires is crucial for functionality. Refer to the diagram to avoid errors‚ ensuring safe and efficient installation. Proper connections prevent issues like communication errors or system malfunctions‚ guaranteeing optimal performance of your HVAC system.
4.2 Connecting to HVAC System
Properly connecting the Amana Smart Thermostat to your HVAC system is essential for optimal performance. Match the thermostat wires to the correct terminals (R‚ C‚ W‚ Y‚ G) as per the wiring diagram. Ensure compatibility with your HVAC system type‚ such as conventional PTACs or heat pumps. Refer to the system’s manual for specific requirements. Always power down the HVAC system before connecting the thermostat to avoid damage or electrical hazards. Once connected‚ test the system to ensure proper functionality.
4.3 Powering the Thermostat
To power the Amana Smart Thermostat‚ connect the C-wire to the thermostat’s C terminal. If no C-wire is available‚ ensure the system is compatible with alternative power sources. Use the USB-C cable provided for initial setup and provisioning. Always power down the HVAC system before connecting or disconnecting wires to prevent damage. Follow the wiring diagram to ensure proper electrical connections and safe operation of the thermostat.
Smart Features and Setup
The Amana Smart Thermostat offers Wi-Fi connectivity for remote control via the Amana Home app. Enable voice control with Amazon Alexa for hands-free temperature adjustments. Pairing the thermostat with the app allows you to monitor and adjust settings‚ schedule temperatures‚ and receive energy usage reports‚ enhancing your smart home experience with convenience and efficiency.
5.1 Enabling Wi-Fi on the Thermostat
To enable Wi-Fi on your Amana Smart Thermostat‚ navigate to the settings menu and select “Wi-Fi Setup.” Choose your network from the available options and enter the password. Once connected‚ the thermostat will link to your Amana Home app‚ allowing remote temperature control and smart features like voice commands with Amazon Alexa. Ensure a stable internet connection for optimal performance and seamless integration with your smart home system.
5.2 Downloading and Installing the Amana Home App
Download the Amana Home app from the Apple App Store or Google Play Store. Once installed‚ launch the app and create an account or log in if you already have one. The app allows you to manage multiple Amana smart thermostats‚ adjust settings‚ and monitor energy usage. Ensure your thermostat is Wi-Fi enabled before proceeding to pair it with the app for full remote control functionality and smart home integration.
5.3 Pairing the Thermostat with the App
To pair the Amana Smart Thermostat with the app‚ ensure the thermostat is in Wi-Fi mode. Open the Amana Home app‚ log in‚ and navigate to the “Add Device” section. Select “Thermostat” and follow the in-app instructions. The app will detect the thermostat and guide you through the pairing process. Once connected‚ you can control the thermostat remotely and access advanced smart features.

Advanced Configuration
The advanced configuration allows users to set up voice control with Amazon Alexa‚ customize smart temperature schedules‚ and enable remote access for enhanced convenience.
6.1 Setting Up Voice Control with Amazon Alexa
To enable voice control‚ link your Amana Smart Thermostat with Amazon Alexa. Log into your Alexa account via the app‚ enable the Amana Smart Thermostat skill‚ and authorize the connection. Once paired‚ use voice commands like‚ “Alexa‚ set my thermostat to 75 degrees‚” to adjust settings hands-free. Ensure your thermostat is Wi-Fi enabled and properly configured for seamless integration with Alexa.
6.2 Configuring Temperature Schedules
Configure temperature schedules using the Amana Home app to optimize energy usage and comfort. Create custom schedules with specific temperature settings for different times of the day or week. Adjust the thermostat to energy-saving modes during periods of inactivity and return to comfort settings when needed. Ensure the thermostat is in “schedule” mode to apply these settings effectively. This feature helps maintain consistent temperatures while reducing energy waste.
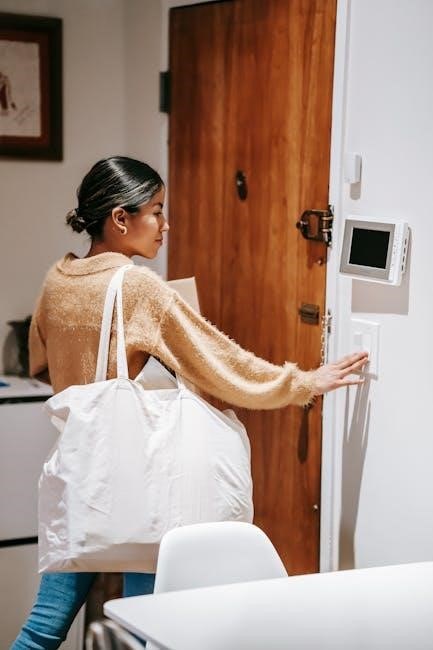
6.3 Enabling Remote Access
Enable remote access to control your Amana Smart Thermostat from anywhere using the Amana Home app. Ensure the thermostat is connected to your Wi-Fi network and the app is installed on your device. Open the app‚ select the thermostat‚ and follow the prompts to enable remote access. This feature allows you to adjust settings‚ monitor energy usage‚ and receive notifications via your smartphone or tablet‚ enhancing convenience and energy management.

Troubleshooting Common Issues

Common issues include connectivity problems or display malfunctions. Check wire connections‚ restart the system‚ and ensure proper setup. Refer to the manual for detailed solutions.
7.1 Resolving Communication Errors
Communication errors often occur due to incorrect wiring or connectivity issues. Ensure all wires are securely connected between the thermostat and HVAC system. Verify that wires 1‚ 2‚ C‚ and R are correctly matched. If using a wired connection‚ ensure the USB-C cable is properly connected for provisioning. Restart the thermostat and HVAC system after making adjustments. If issues persist‚ consult the manual or contact Amana support for further assistance.
7.2 Fixing Connectivity Problems
Connectivity issues with your Amana Smart Thermostat can often be resolved by restarting the device and your router. Ensure the thermostat is connected to your Wi-Fi network and that the signal strength is adequate. Check the Amana Home app for updates and verify that your thermostat’s firmware is up to date. If problems persist‚ reset the thermostat to factory settings and re-pair it with the app to restore connectivity.
7.3 Addressing Display Issues
Common display issues with the Amana Smart Thermostat include a blank or unresponsive screen. Check the power supply and ensure all wires are securely connected. Restart the thermostat by removing it from the base and waiting 30 seconds before reattaching. Clean the screen gently with a soft cloth to remove any dirt or smudges. If the issue persists‚ reset the thermostat to factory settings or contact customer support for assistance.

Safety Precautions
Handle electrical components carefully to avoid shocks or damage. Ensure proper installation practices to prevent system malfunctions. Avoid physical stress on the thermostat to maintain functionality and safety.
8.1 Handling Electrical Components Safely
Always disconnect power before handling electrical components to prevent shocks. Use appropriate tools and ensure wires are securely connected. Avoid touching live terminals or wires. Keep components away from water and flammable materials. Properly ground the system to prevent electrical hazards. Follow manufacturer guidelines for safe installation practices to ensure system reliability and user safety.
8.2 Avoiding Damage to the Thermostat
To prevent damage‚ handle the thermostat gently and avoid physical impact. Secure it firmly to the wall to prevent accidental bumps. Use the correct tools for installation and avoid overloading the device with excessive wiring. Keep the thermostat away from water and extreme temperatures. Regularly clean the display and internal components to maintain functionality. Ensure proper power supply and avoid touching sensitive electronic parts to preserve longevity and performance.
8.3 Ensuring Proper Installation Practices
Follow the manufacturer’s guidelines strictly to ensure a safe and effective installation. Verify system compatibility before starting‚ and use the correct tools to avoid damage. Mount the thermostat securely on a flat surface‚ ensuring proper alignment. Always turn off the power supply before handling wires. Double-check all connections for accuracy and test the system post-installation. Consult the manual or a professional if unsure to guarantee optimal performance and safety.
9.1 Summary of Installation Process
The Amana Smart Thermostat installation involves preparing the site‚ removing the old thermostat‚ mounting the new device‚ connecting wires‚ and performing final checks. Ensure proper wiring to avoid communication errors and system recognition issues. Follow safety guidelines when handling electrical components. After installation‚ enable Wi-Fi and pair the thermostat with the Amana Home app for remote control and advanced features like voice commands and temperature scheduling. Refer to the homeowner guide for detailed instructions and troubleshooting tips.
9.2 Final Tips for Optimal Usage
For optimal performance‚ regularly update the thermostat software and ensure stable Wi-Fi connectivity. Use the Amana Home app to set temperature schedules and enable remote access. Adjust settings based on occupancy and preferences to maximize energy savings. Utilize voice control with Amazon Alexa for convenience. Monitor energy usage reports to identify efficiency improvements. Always follow safety guidelines and refer to the homeowner guide for troubleshooting and maintenance tips;